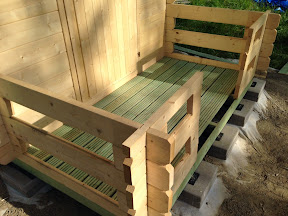
Today our play house got its floor and roof. First we jacked up the three inner foundation beams to make sure they are level. A little padding and all is good. Then we installed the floor of the terrace, and then the floor inside (photos above and below, respectively).
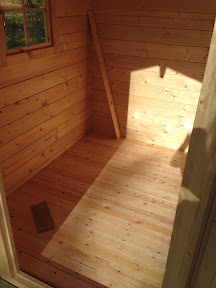
In order to allow the wooden structure to move a bit over time, gaps must be left between the panels of 1-1.5 mm and 5 mm around the edges. The gaps between the floor boards of the terrace are about a centimetre wide.
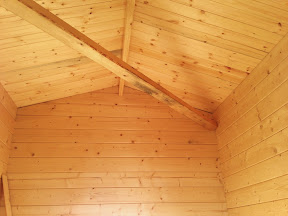
This gave us good ground for a ladder in order to put the roof panelling in place. Starting from front to back, and one side at a time, the panels were installed — again making sure that there's a 1-1.5 mm gap between the individual panels.
What about the diagonal beam under the roof? As explained in
yesterday's blog post despite all care, the whole structure was skewed and while both diagonals at the bottom were as precisely the same as can be (to 1 mm), at the top the diagonals differed by some 2 cm! This was fixed by putting the beam in place after cutting it to exactly the correct length of the diagonal. Once installed, both diagonals matched also at the top.
Now that everything is in place and the roof is on, the tension's gone elsewhere and the diagonal beam is lying loose without any pressure on it, secured by a few nails.
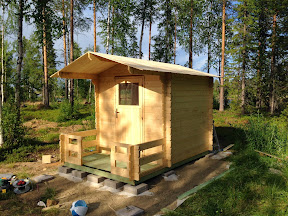
This is what it looks like now, after completion of this stage.
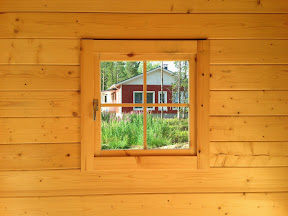
Finally a photo of
Our House as seen from inside the play house. Tomorrow we plan to continue with putting the bitumen tiles on the roof and possibly giving the play house a first coat of primer paint in order to protect it from the elements.
By the way, the play house is a kit marketed as "Lillevilla 209" or "
Lillevilla Playhouse 4", a product from Finland, which is available elsewhere in Europe, too.
No comments:
Post a Comment